Quick Navigation
Goal
The inspiration for this project was from the horror game 'The Voidness'. This game uses a LiDAR detector to map out the world in real time.
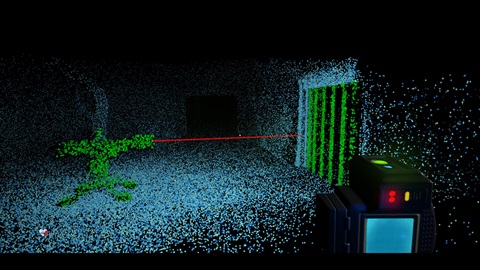
Image From: The Voidness Steam Page
The technique of hiding visuals until light interacts with them was interesting to me and a few friends, and so in 2022 we created a puzzle game titled 'Luminous'. This project, which was successful, was also too highly scoped, as we included online multiplayer and three levels within a 12 week deadline and myself as the only programmer. This created limitations within the scope of the project, visuals and lighting being a major factor.
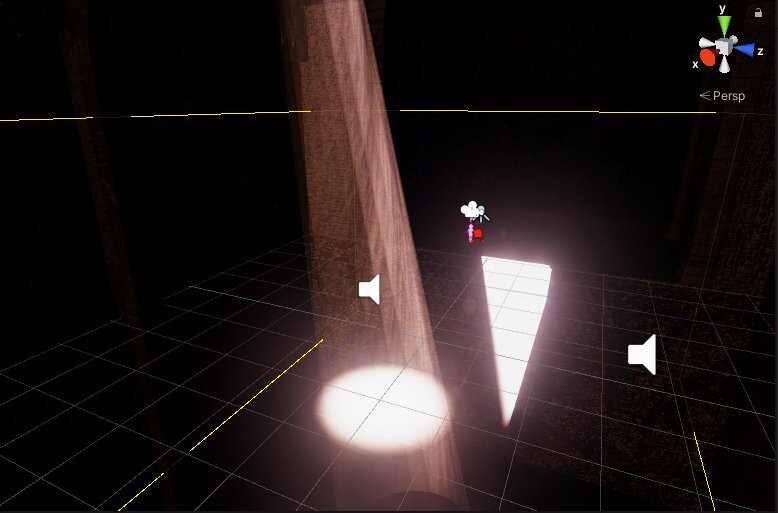
Image From: Luminous GitHub
The main limiting factor, and the goal of this project, is to address the lighting within this game. The shader was initially created using HLSL for Unity's base Render Pipeline, which is extremely limited in terms of lighting and visual support. As such, this prototype aims to update the shader code to use Unity's Universal Render Pipeline, allowing more interesting visuals.
Code Conversion
The initial code we're working with can be found below. To briefly explain its functionality, we use Unity's SpotLight system to visualize the values we're using. These values are LightPosition, LightRotation, LightAngle, Colour and LightRange. We pass each of these into the shader on each frame, and then each fragment computes how brightly it should be lit.
Shader "Reveal Object with Light"
{
Properties
{
    _Color("Color", Color) = (1,1,1,1)
    _MainTex("Albedo (RGB)", 2D) = "white" {}
    _Glossiness("Smoothness", Range(0,1)) = 0.5
    _Metallic("Metallic", Range(0,1)) = 0.0
    _Alpha("Alpha", Range(0,1)) = 0.0
    _LightDirection("Light Direction", Vector) = (0,0,1,0)
    _LightPosition("Light Position", Vector) = (0,0,0,0)
    _LightAngle("Light Angle", Range(0,180)) = 45
    _StrengthScalar("Strength", Float) = 50
    _StrengthDistance("StrengthDist", Float) = 0
    _RequirementsMet("Visible", Float) = 0
}
    SubShader
    {
        Tags{ "RenderType" = "Transparent" "Queue" = "Transparent" }
        Blend SrcAlpha OneMinusSrcAlpha
        LOD 200
        CGPROGRAM
        #pragma surface SurfaceReveal Standard fullforwardshadows alpha:fade
        #pragma target 3.0

        sampler2D _MainTex;
        struct Input
        {
            float2 UVMainTex;
            float3 worldPos;
        };//Struct end

        half   _Glossiness;
        half   _Metallic;
        fixed4 _Color;
        half Alpha;
        float4 _LightPosition;
        float4 _LightDirection;
        float  _LightAngle;
        float  _StrengthScalar;
        float  _StrengthDistance;

        void SurfaceReveal(Input input, inout SurfaceOutputStandard R)
        {
            float3 Dir = normalize(_LightPosition - input.worldPos);
            float  Scale = dot(Dir, _LightDirection);
            float  Strength = clamp(Scale - cos(_LightAngle * (UNITY_PI / 360.0)), 0, 1);
            Strength = clamp(Strength *	 * _StrengthDistance, 0, 1);
            fixed4 RC = tex2D(_MainTex, input.UVMainTex) * _Color;
            R.Albedo = RC.rgb;
            R.Metallic = _Metallic;
            R.Smoothness = _Glossiness;
            R.Alpha = Strength * RC.a;

        }
    ENDCG
    }
FallBack "Diffuse"
}
To convert this, first we create an Unlit Shader Graph and create the variables described earlier. We must also add in and expose a Texture2D for the objects texture, and a Strength Scalar to control the power of the material.
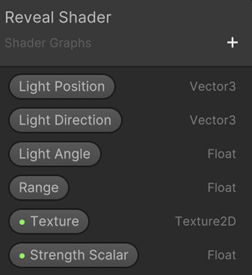
Variables
Now to calculate we need to calculate the intensity for each fragment. We're going to copy exactly what was done in the code snippet seen above, and replace the Color variable with our new Texture2D.
First we calculate the ideal direction, which would display the current fragment fully.
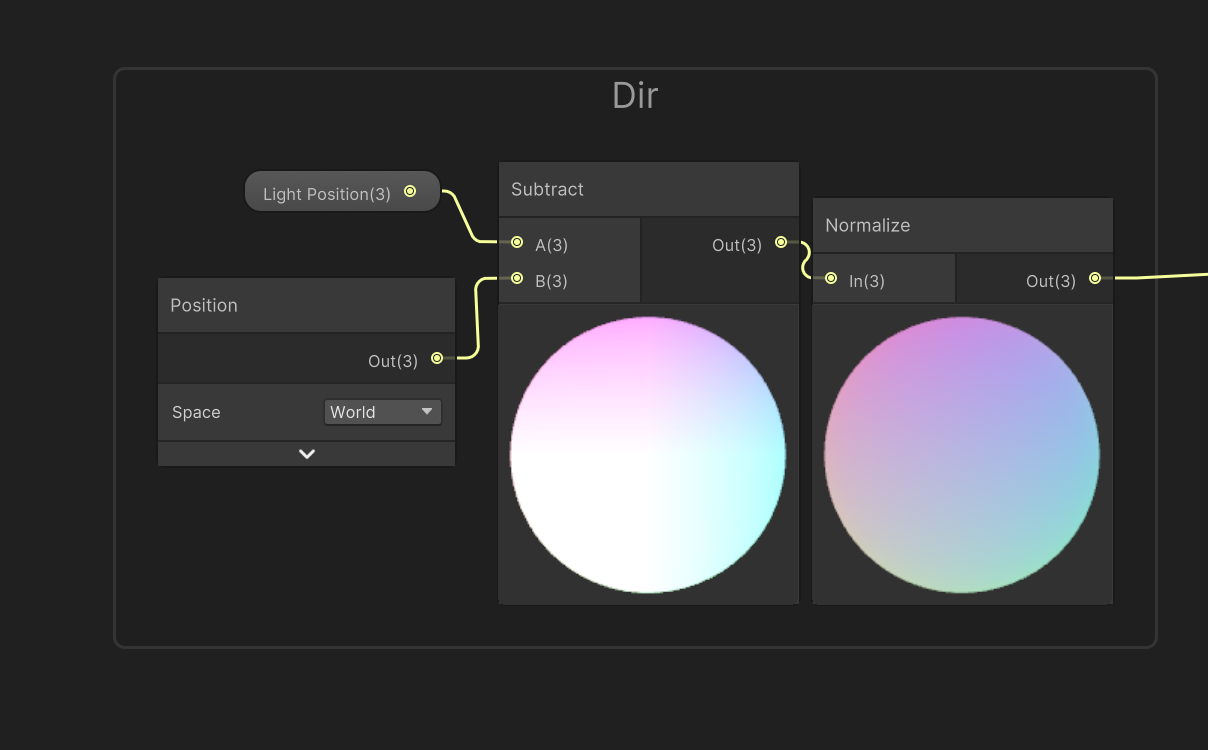
Ideal Direction
Next we use the dot product of the lights forward direction, and the ideal direction to get all intersections.
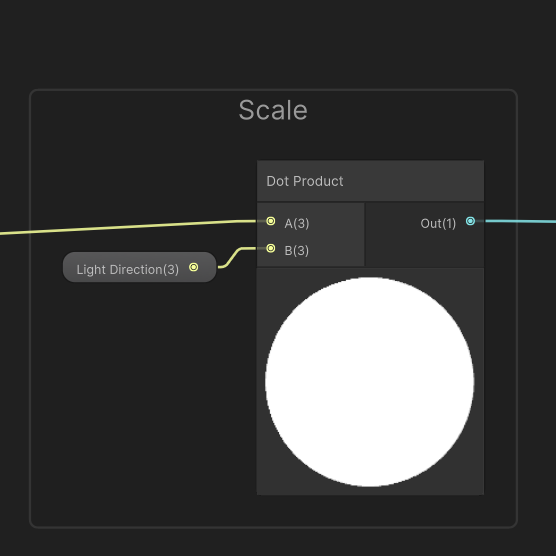
Visible Intersections
This then needs to be constrained to the Light Angles circle, which gives us exactly where the light is hitting for each fragment.
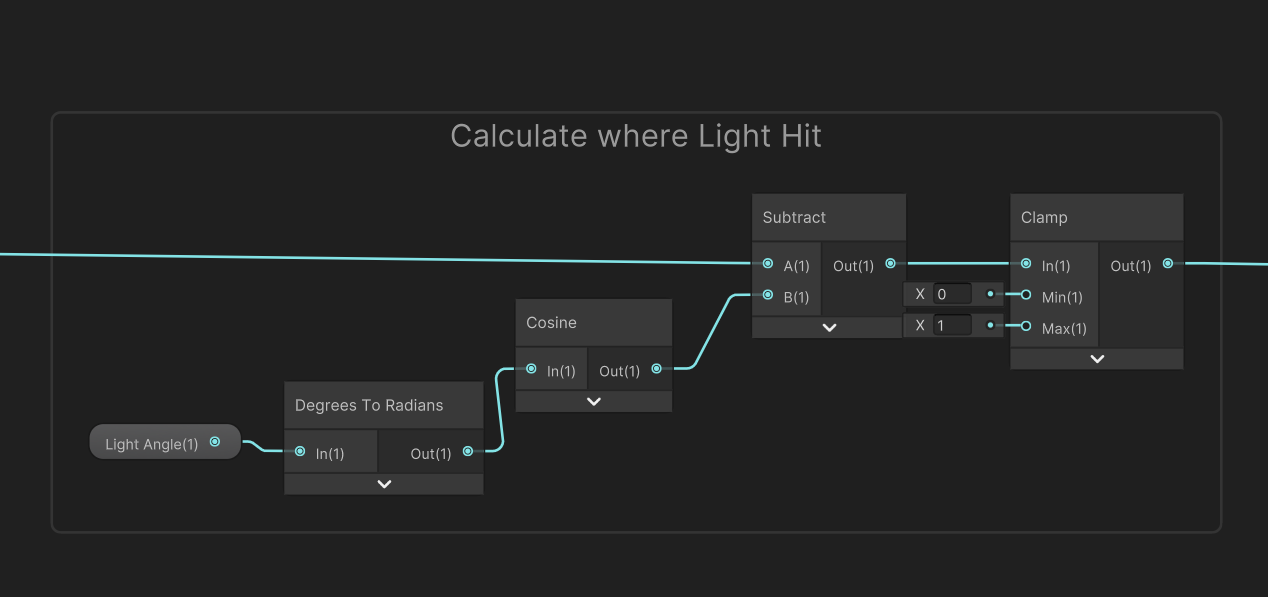
Constrained Light Hit
This then needs to be constrained to the Light Angles circle, which gives us exactly where the light is hitting for each fragment.

Constrained Light Hit
Next we must calculate the final strength, by applying the exposed Strength Scalar, and calculating the Strength Distance found by the distance between the objects position, and the lights position.
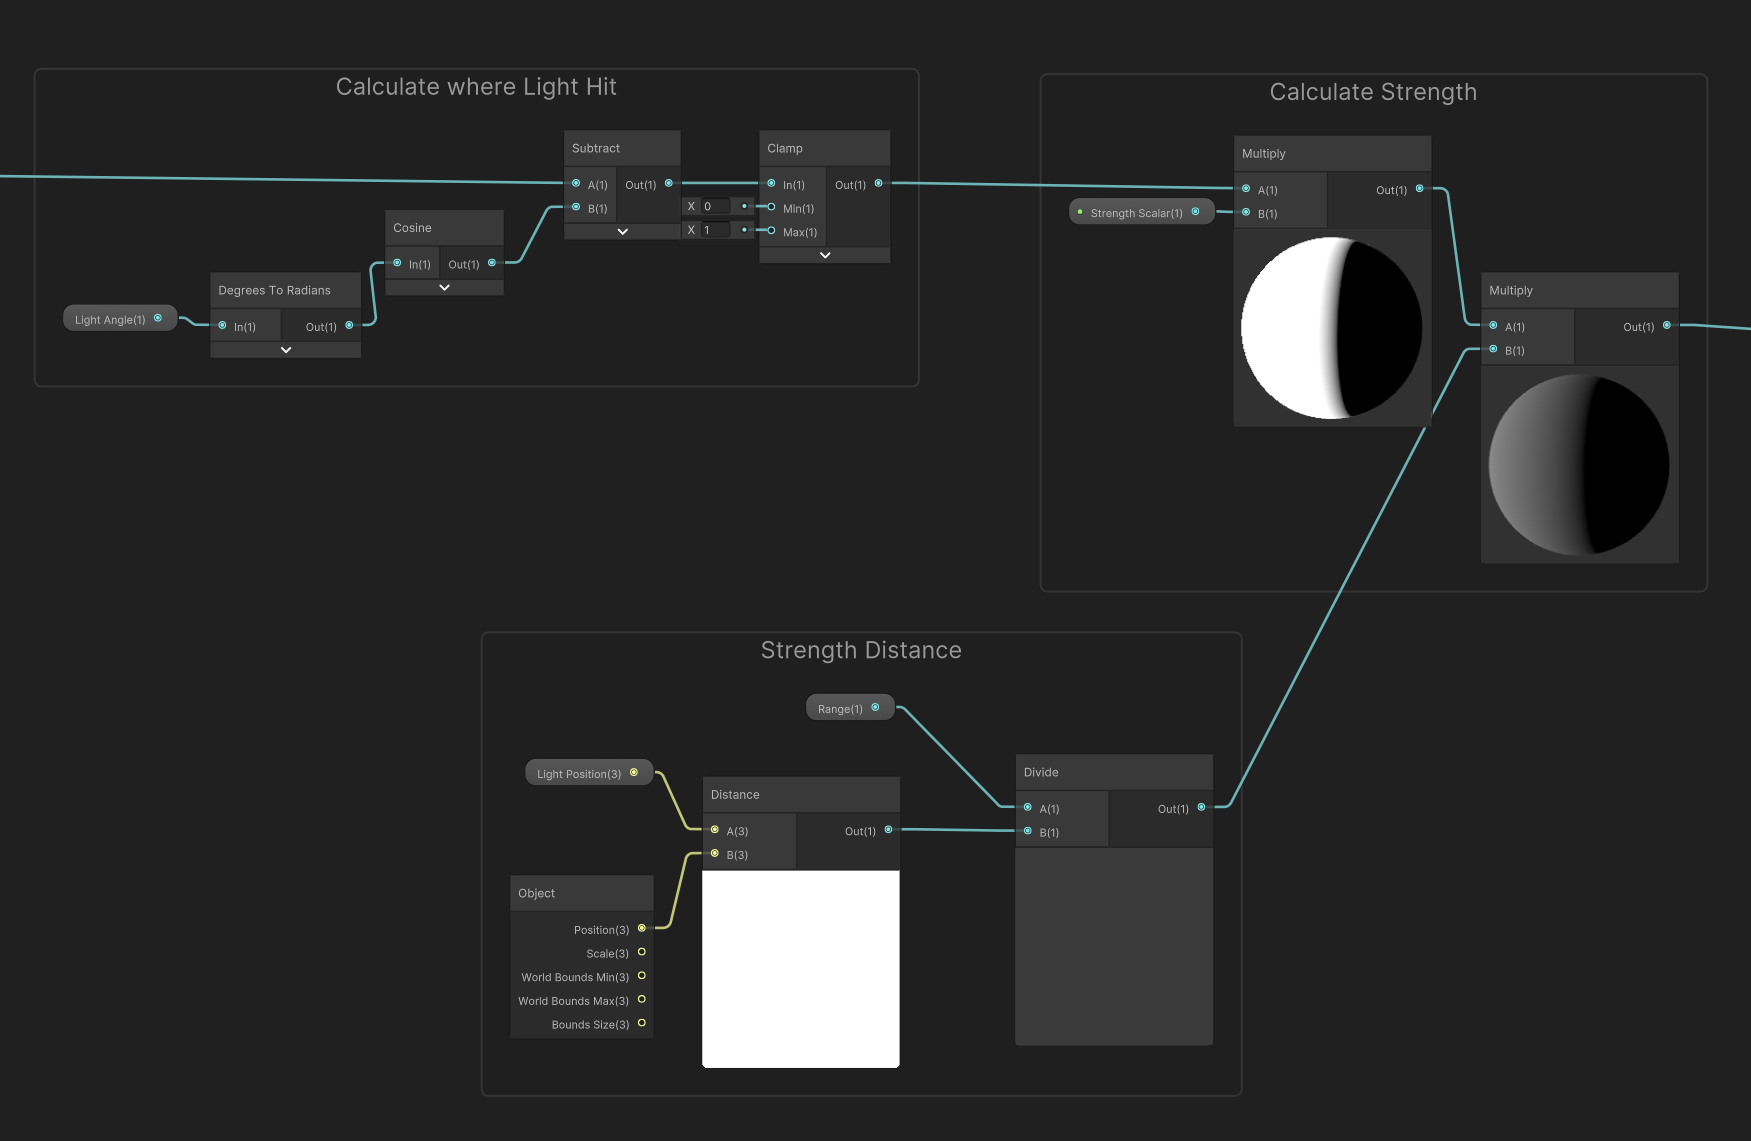
Constrained Light Hit
Finally, this is all applied to the textures alpha to get our final result.
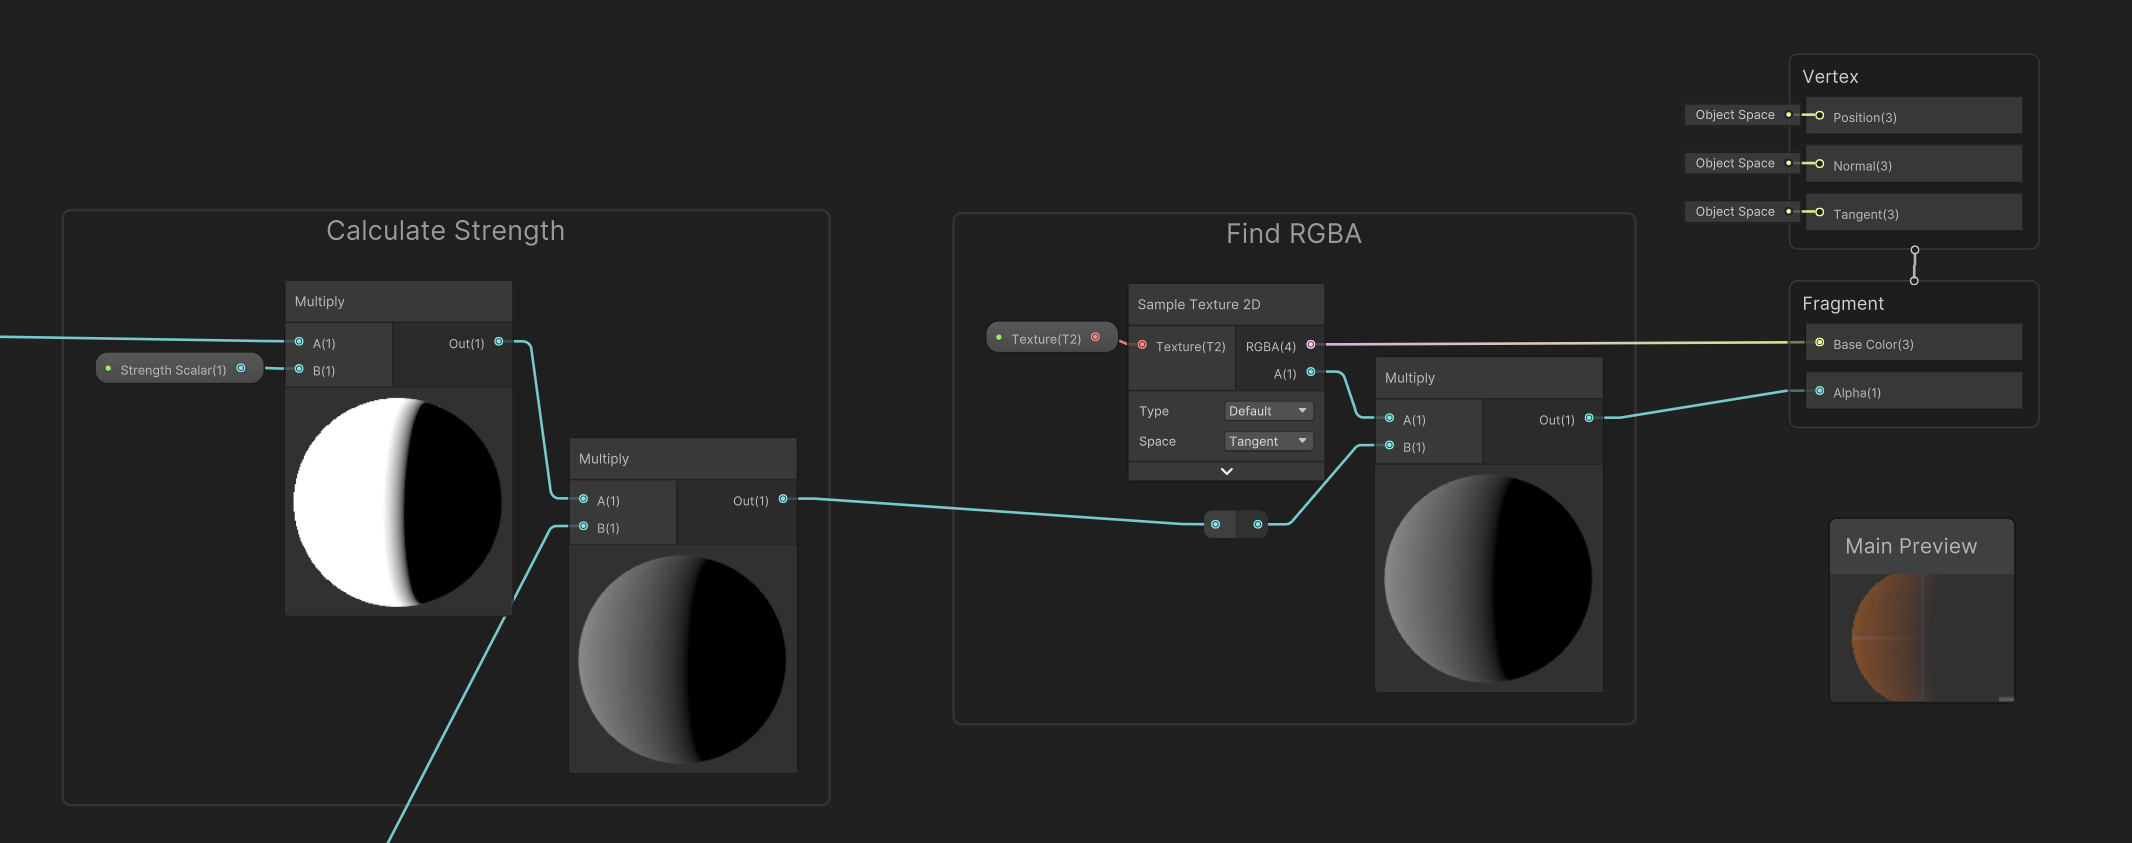
Constrained Light Hit
Final
To finish this, we pass through the variables _Light_Position, _Light_Direction, _Light_Angle and _Range. These references can be changed within the shader on each of the variables. The code to pass these variables is provided below.
using UnityEngine;

public class ActivateLight : MonoBehaviour
{
    [SerializeField] Material revealMat;
    Light light;


    private void Awake()
    {
        light = GetComponent();
    }

    private void Update()
    {
        UpdateShader();
    }
    void UpdateShader()
    {
        revealMat.SetVector("_Light_Position", light.transform.position);
        revealMat.SetVector("_Light_Direction", -light.transform.forward);
        revealMat.SetFloat("_Light_Angle", light.spotAngle);
        revealMat.SetFloat("_Range", light.range);
    }
}
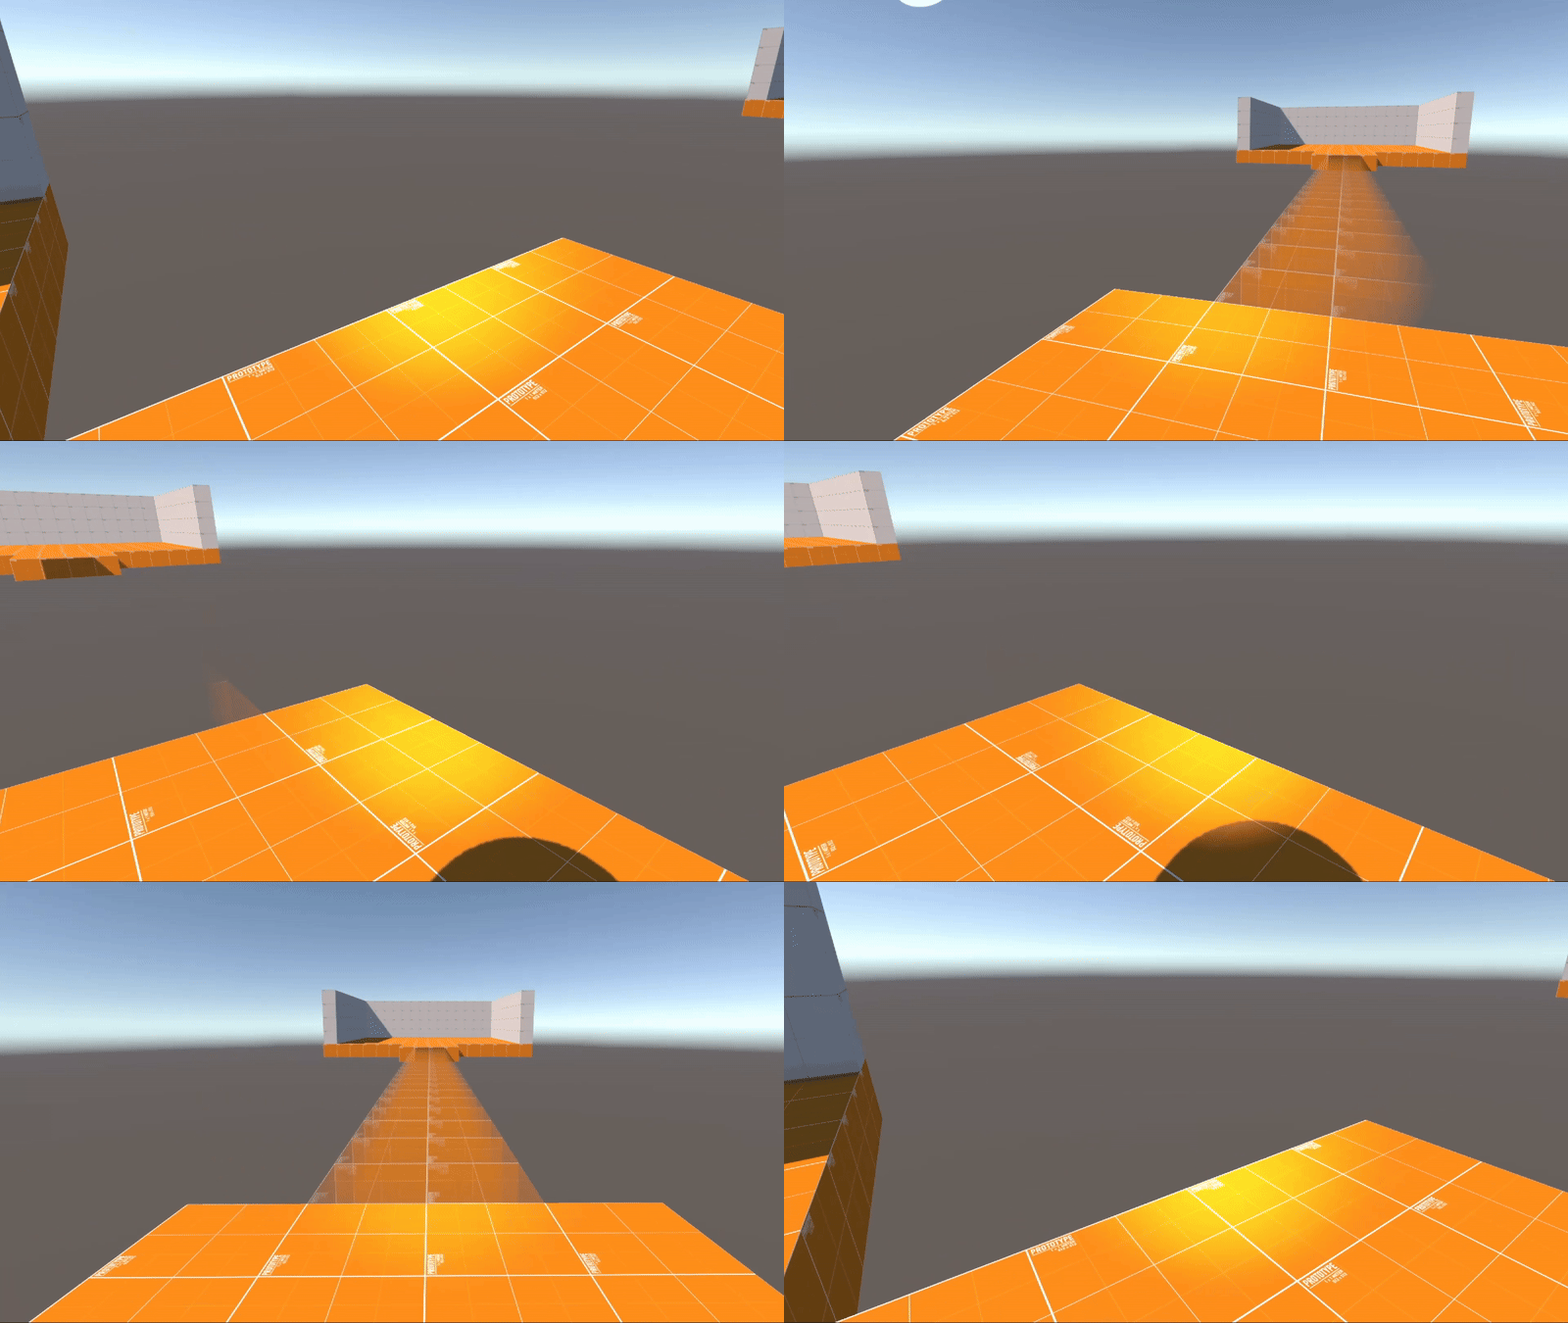
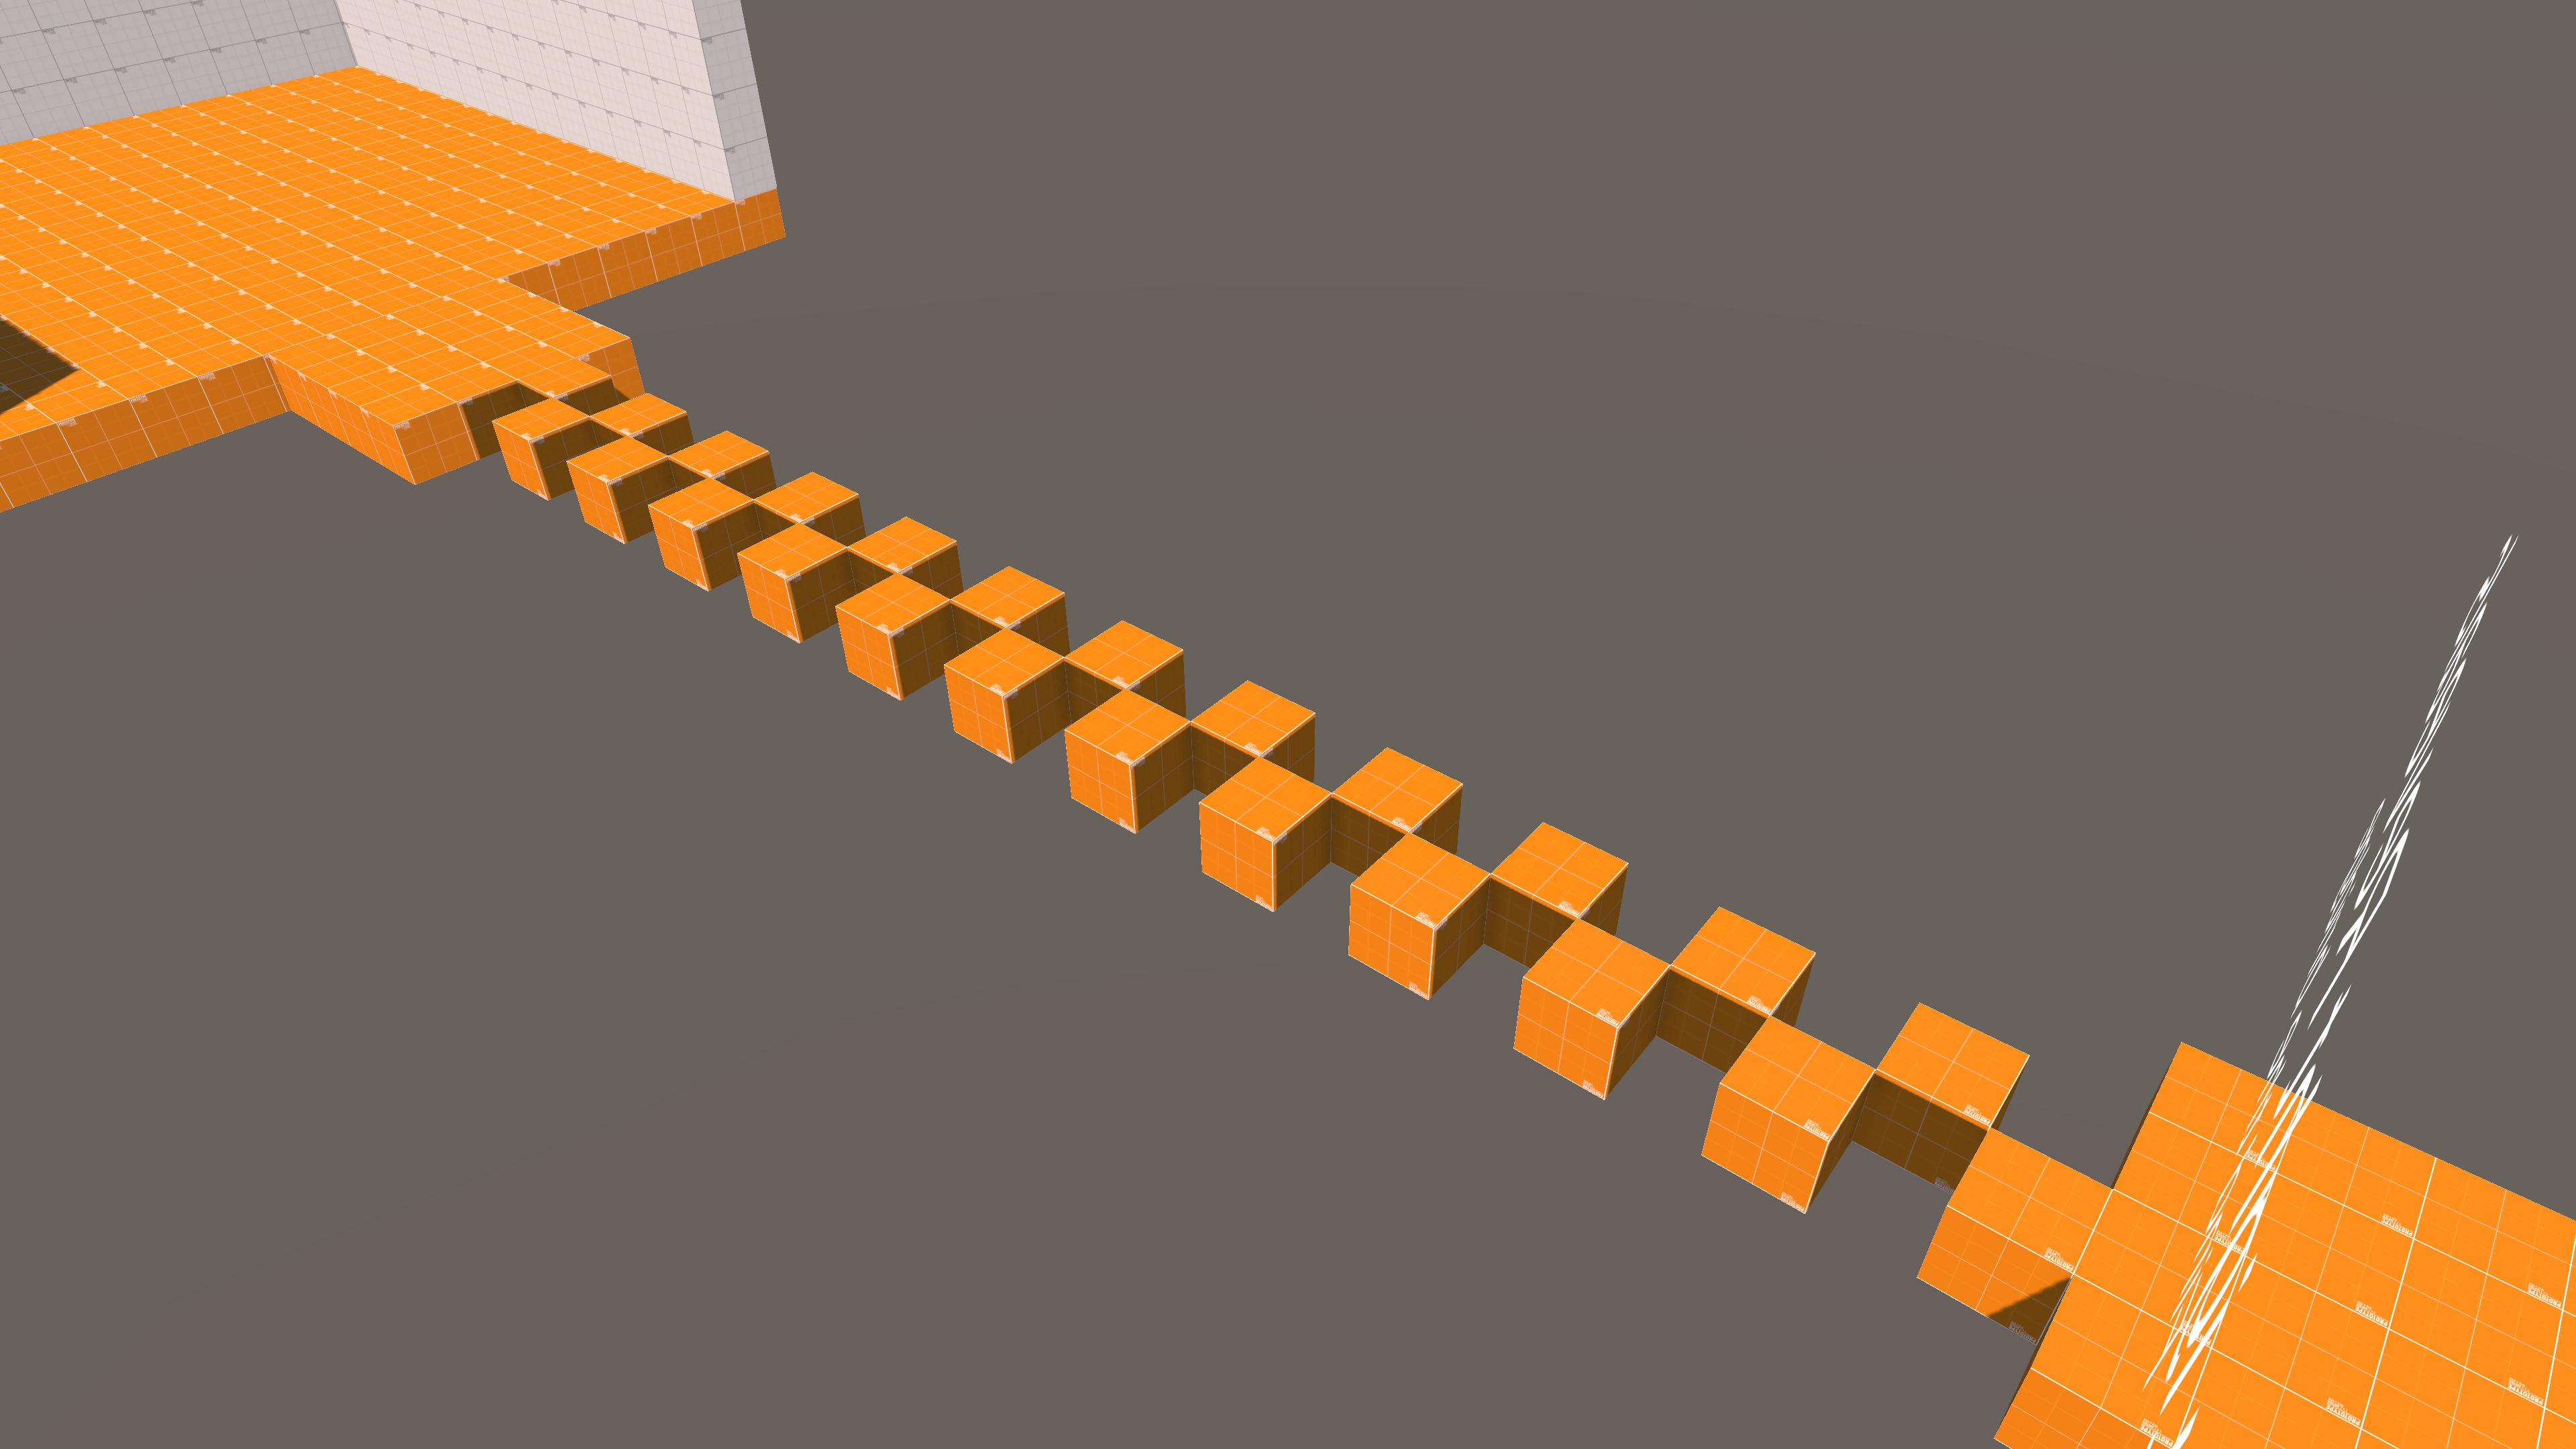
Below are some provided visuals of the final product. There is definitely some optimisation to be made, for instance, we update many variables that do not change, Range being a main example. We could create a check for each variable to see if it has been updated this frame, and if so, only then will we pass it through.
We also do not yet support multiple light sources, which could be a possible avenue for future development.
